
Shoulder evaluations are indicated by signs/symptoms in the shoulder, periscapular region, neck, or upper extremity, requiring a standardized, comprehensive protocol for effective care.
A. Indications for Comprehensive Shoulder Evaluation
A thorough shoulder evaluation is crucial when patients present with a variety of clinical signs and symptoms. These indications extend beyond isolated shoulder pain, encompassing issues within the periscapular area, referred pain from the neck, or even vague discomfort in the upper extremity.
Specifically, any patient exhibiting shoulder, periscapular, neck, or nonspecific upper extremity signs or symptoms warrants a detailed assessment. This comprehensive approach ensures that all potential sources of pain and dysfunction are considered, leading to an accurate diagnosis and appropriate treatment plan. A systematic evaluation is paramount for optimal patient outcomes.
B. Importance of a Standardized Protocol
Employing a standardized protocol during shoulder examination is essential for consistency and reliability. This ensures that all relevant aspects of shoulder function are assessed in a systematic manner, minimizing the risk of overlooking critical findings.
A structured approach, including visual inspection, palpation, range of motion assessment, and specific cuff tests, allows for accurate comparison of findings over time and facilitates effective communication among healthcare professionals. Following a defined protocol enhances the interprofessional team’s ability to deliver coordinated and high-quality care to patients with shoulder pathology.
II. Patient History
A thorough patient history involves detailing the present illness and understanding activities/functional limitations, crucial steps in evaluating shoulder joint issues.
A. History of Present Illness
Gathering a detailed history of the present illness is paramount. Clinicians should inquire about the onset, mechanism of injury (if applicable), and character of the patient’s shoulder pain.
Specifically, explore pain location, radiation, and aggravating/relieving factors. Understanding the chronology of symptoms – when they began, how they’ve progressed, and any associated events – is vital.
Furthermore, document any prior treatments attempted, their effectiveness, and any previous medical evaluations related to the shoulder. A comprehensive history lays the foundation for a focused physical examination and accurate diagnosis.
B. Activities and Functional Limitations
Assessing activities and functional limitations provides crucial insight into the impact of shoulder pathology on the patient’s daily life. Inquire about specific activities that are difficult or impossible to perform due to shoulder pain or dysfunction.
This includes overhead activities, reaching, lifting, carrying, and even simple tasks like dressing or personal hygiene.
Determine how these limitations affect the patient’s work, hobbies, and overall quality of life. A thorough understanding of functional deficits guides treatment planning and helps establish realistic rehabilitation goals.

III. Visual Inspection
Visual inspection assesses shoulder alignment and identifies potential muscle atrophy; a key component of the five-minute office exam, as outlined in examination checklists.
A. Shoulder Alignment Assessment
A thorough shoulder alignment assessment is the initial step in a comprehensive shoulder examination. This involves observing the patient from multiple angles – anterior, posterior, and lateral – to identify any obvious deformities or asymmetries. Key landmarks to evaluate include the acromion, clavicle, and scapula, noting their position relative to each other.
Look for any signs of shoulder height discrepancy, scapular winging, or prominence of bony structures. Assessing alignment helps to pinpoint potential structural issues contributing to the patient’s symptoms. Careful observation during the visual inspection phase provides crucial information for formulating a differential diagnosis and guiding further examination steps.
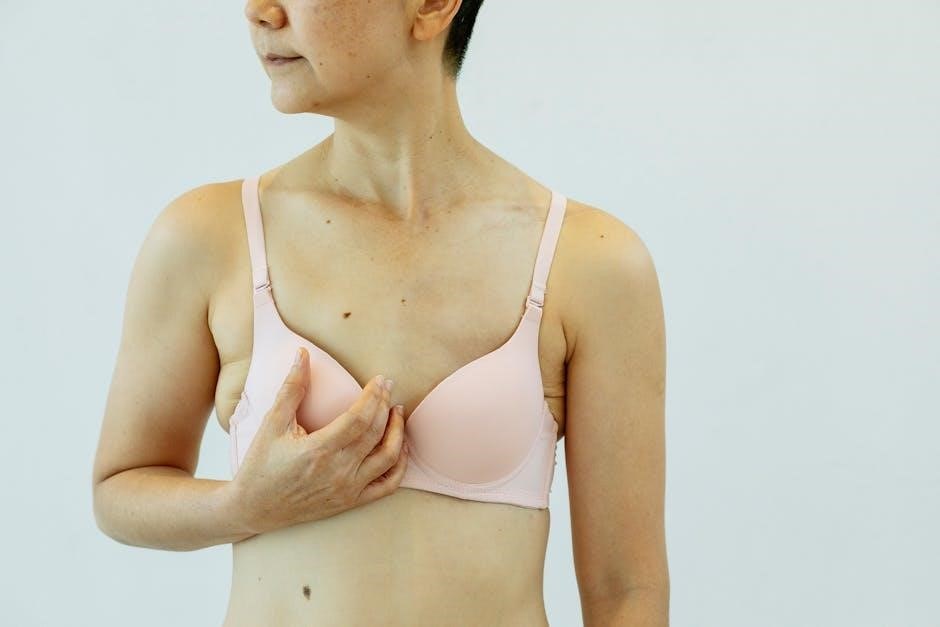
B. Observation for Muscle Atrophy
Muscle atrophy is a significant finding during the visual inspection of the shoulder, often indicating chronic disuse or nerve involvement. Specifically, assess the supraspinatus and infraspinatus fossae, as well as the deltoid muscle, for any noticeable wasting. Compare both sides to identify subtle differences in muscle bulk.
Atrophy of the deltoid can suggest axillary nerve pathology, while wasting of the rotator cuff muscles may indicate a chronic tear or nerve compression. Documenting the presence and degree of atrophy is crucial, as it provides valuable insight into the duration and severity of the shoulder dysfunction, influencing treatment decisions.
IV. Palpation
Palpation involves assessing bony landmarks and identifying tenderness or soft tissue abnormalities, crucial for diagnosing shoulder pathology during a physical examination.
A. Palpation of Bony Landmarks
Palpation of key bony landmarks is a fundamental step in a comprehensive shoulder examination. This includes identifying the clavicle, acromion, coracoid process, and the greater and lesser tuberosities of the humerus. Accurate localization helps assess alignment and identify potential bony irregularities.
The examiner should systematically palpate each landmark, noting any crepitus, tenderness, or step-offs. Palpation also extends to the scapula, focusing on the spine, medial border, and inferior angle. This process provides valuable information regarding structural integrity and potential sources of pain, guiding further evaluation and diagnosis.
B. Palpation for Tenderness and Soft Tissue Abnormalities
Following bony landmark palpation, assess for tenderness and soft tissue abnormalities around the shoulder joint. This involves carefully palpating the rotator cuff tendons (supraspinatus, infraspinatus, teres minor, and subscapularis), the biceps tendon, and the surrounding bursae.
Note any localized pain, swelling, or muscle spasm. Palpate along the deltoid muscle and scapular stabilizers for trigger points or areas of tightness. Assess for the presence of masses or fluid collections. Identifying tenderness guides further investigation, potentially indicating tendinitis, bursitis, or rotator cuff pathology.

V. Range of Motion Assessment
Evaluate both active (AROM) and passive (PROM) range of motion to identify limitations and pain patterns, crucial for diagnosing shoulder dysfunction and guiding treatment.
A. Active Range of Motion (AROM)
Assessing AROM involves observing the patient’s ability to move the shoulder joint through its full spectrum of motion without assistance. This is a fundamental step in the shoulder examination process, providing valuable insight into the patient’s functional capabilities and potential limitations.
Specifically, clinicians should evaluate flexion, extension, abduction, adduction, internal rotation, and external rotation. Note any pain, compensations, or limitations during these movements. Observing AROM helps differentiate between structural issues and muscular weakness or pain inhibition. Documenting these findings accurately is essential for establishing a baseline and tracking progress throughout the rehabilitation process.
B. Passive Range of Motion (PROM)
PROM assessment involves the examiner moving the patient’s shoulder joint through its range of motion, while the patient remains relaxed. This crucial step helps distinguish between limitations caused by joint restrictions, capsular patterns, or pain versus those stemming from muscle weakness or active control issues.
Evaluate the same movements as AROM – flexion, extension, abduction, adduction, internal and external rotation – noting any resistance, pain, or end-feel abnormalities. Comparing PROM to AROM provides valuable diagnostic information. A significant difference suggests muscle weakness or pain inhibition, while limited PROM indicates a joint or soft tissue restriction.
VI. Cuff-Specific Testing
Cuff-specific tests, like the Full Can and Empty Can tests, are essential components of a shoulder examination, helping to identify rotator cuff pathology.
A. Full Can Test
The Full Can Test assesses the supraspinatus muscle function. The patient abducts the arm to 90 degrees in the scapular plane, internally rotates (thumb pointing down), and then further abducts against resistance. A positive test—pain or weakness—suggests supraspinatus involvement.
This test minimizes the impact of secondary muscle activation, isolating the supraspinatus more effectively than the Empty Can Test. It’s a crucial part of the cuff-specific testing during a comprehensive shoulder examination, aiding in diagnosing rotator cuff tears or tendinopathy. Proper technique and patient positioning are vital for accurate results.
B. Empty Can Test
The Empty Can Test also evaluates the supraspinatus muscle, but utilizes a different arm position. The patient abducts the arm to 90 degrees in the scapular plane, internally rotates (thumb pointing down – creating an “empty can” appearance), and then resists downward pressure.
Pain or weakness indicates a potential supraspinatus issue. While commonly used, it can sometimes produce false positives due to impingement or other factors. It’s performed alongside the Full Can Test during cuff-specific testing, contributing to a more complete assessment of rotator cuff functionality during a shoulder examination.

VII. Special Tests for Shoulder Pathology
Special tests like Apprehension/Relocation and Neer/Hawkins are crucial for identifying instability or impingement, aiding in accurate shoulder pathology diagnosis.
A. Apprehension/Relocation Test (Instability)
The Apprehension test assesses anterior shoulder instability. The examiner passively abducts and externally rotates the patient’s arm, observing for a look of apprehension or resistance. A positive test indicates potential instability.
Following apprehension, the Relocation test is performed. A posterior force is applied to the anterior humeral head while maintaining abduction and external rotation. Reduction of apprehension with posterior force suggests anterior instability. This two-part test helps differentiate true instability from discomfort due to other issues.
Careful observation of the patient’s facial expressions and verbal feedback is essential during both phases of this assessment for accurate interpretation.
B. Neer and Hawkins Tests (Impingement)
The Neer test evaluates for shoulder impingement. The examiner passively forward-flexes the patient’s arm with the shoulder stabilized, compressing the greater tuberosity against the acromion. Pain suggests impingement.
The Hawkins-Kennedy test also assesses impingement. The examiner forward-flexes and internally rotates the patient’s arm to 90 degrees, then forcibly internally rotates. Pain indicates potential impingement of the supraspinatus tendon.
Both tests aim to reproduce the patient’s pain, but a positive result doesn’t definitively confirm impingement; clinical correlation is crucial for accurate diagnosis.

VIII. Ultrasound Examination Relevance
Ultrasound is valuable for assessing LHBT tendinosis/rupture, subscapularis tears, and guiding needle placement within the anterior shoulder region for diagnosis.
A. LHBT Tendinosis & Rupture Assessment
Ultrasound plays a crucial role in evaluating the long head of the biceps tendon (LHBT), specifically identifying tendinosis, complete ruptures, subluxation, or even dislocations. This assessment is vital due to the LHBT being a significant source of shoulder pain.
The ultrasound examination allows for dynamic assessment, observing the tendon’s behavior during range of motion. Visualizing the tendon’s structure helps determine the extent of any damage, guiding clinical decision-making. Furthermore, ultrasound facilitates accurate needle guidance for potential injections or aspirations, enhancing diagnostic and therapeutic precision within the anterior shoulder region.
B. Subscapularis Tear Evaluation
Ultrasound examination is valuable in assessing potential tears of the subscapularis tendon, a key internal rotator of the shoulder. Accurate diagnosis is crucial, as subscapularis pathology can significantly impact shoulder function and stability.
The ultrasound allows visualization of the tendon’s structure and its attachment to the humerus. Dynamic assessment during internal and external rotation helps identify partial or complete tears. Ultrasound also aids in guiding needle placement for potential injections or aspirations, improving diagnostic accuracy and treatment efficacy in cases of suspected subscapularis involvement.

IX. Diagnosing Shoulder Impingement Syndrome (SIS)
Diagnosis utilizes test-questionnaires, like the SSp, to assess shoulder pain, correlating results with clinical findings for accurate identification of Shoulder Impingement Syndrome.
A. Utilizing Test-Questionnaires (SSp)
The development and validation of a specific test-questionnaire, designated SSp, is crucial for diagnosing Shoulder Impingement Syndrome (SIS) in patients experiencing chronic shoulder pain. This tool aims to provide a standardized method for evaluating pain levels and functional limitations associated with SIS.
Employing the SSp questionnaire allows clinicians to objectively quantify a patient’s symptoms, aiding in differentiating SIS from other potential shoulder pathologies. It contributes to a more accurate and reliable diagnostic process, ultimately guiding appropriate treatment strategies and improving patient outcomes. The questionnaire’s validation ensures its responsiveness and clinical relevance.
B. Correlation with Clinical Findings
Accurate diagnosis of Shoulder Impingement Syndrome (SIS) necessitates a strong correlation between the results obtained from test-questionnaires, like the SSp, and the findings of a thorough clinical examination. This integrated approach ensures a comprehensive assessment of the patient’s condition.
Clinical findings, including range of motion assessments, palpation for tenderness, and specific provocative tests (Neer, Hawkins), must align with the patient’s reported symptoms on the SSp questionnaire. Discrepancies warrant further investigation to rule out alternative diagnoses and refine the treatment plan, optimizing patient care.
X. Long-Standing Shoulder Dislocation Evaluation
Evaluation focuses on identifying reverse Hill-Sachs lesions in patients with chronic shoulder dislocations, guiding surgical treatment considerations for joint stability restoration.
A. Identifying Reverse Hill-Sachs Lesions
Reverse Hill-Sachs lesions are crucial findings in evaluating long-standing shoulder dislocations. These impaction fractures occur on the posterior glenoid rim due to anterior dislocation, and their presence significantly impacts treatment decisions. Careful clinical assessment, alongside advanced imaging like MRI, is essential for accurate identification.
The examiner must assess for pain with specific provocative maneuvers, correlating clinical findings with imaging results. Recognizing these lesions helps determine the extent of glenoid bone loss and guides surgical planning, potentially requiring procedures like the Latarjet or bone block procedures to restore shoulder stability and function.
B. Surgical Treatment Considerations
Surgical intervention for long-standing shoulder dislocations, particularly with identified reverse Hill-Sachs lesions, aims to restore glenohumeral stability. Options range from soft tissue procedures to bone augmentation techniques. The Latarjet procedure, involving coracoid process transfer, is frequently employed to address significant bone loss and prevent recurrent instability.
Alternatively, bone block procedures can augment the posterior glenoid. The choice depends on the degree of bone defect, patient activity level, and surgeon preference. Post-operative rehabilitation is critical, focusing on regaining range of motion and strengthening the surrounding musculature to ensure optimal functional outcomes.